Create a New Course
At the heart of why you are here is to produce and deliver education to your people. That can be done several ways on the Compendium360 Platform, but the primary way is through Courses. Creating a course is super simple. Let’s start with the Basics of Course Creation.
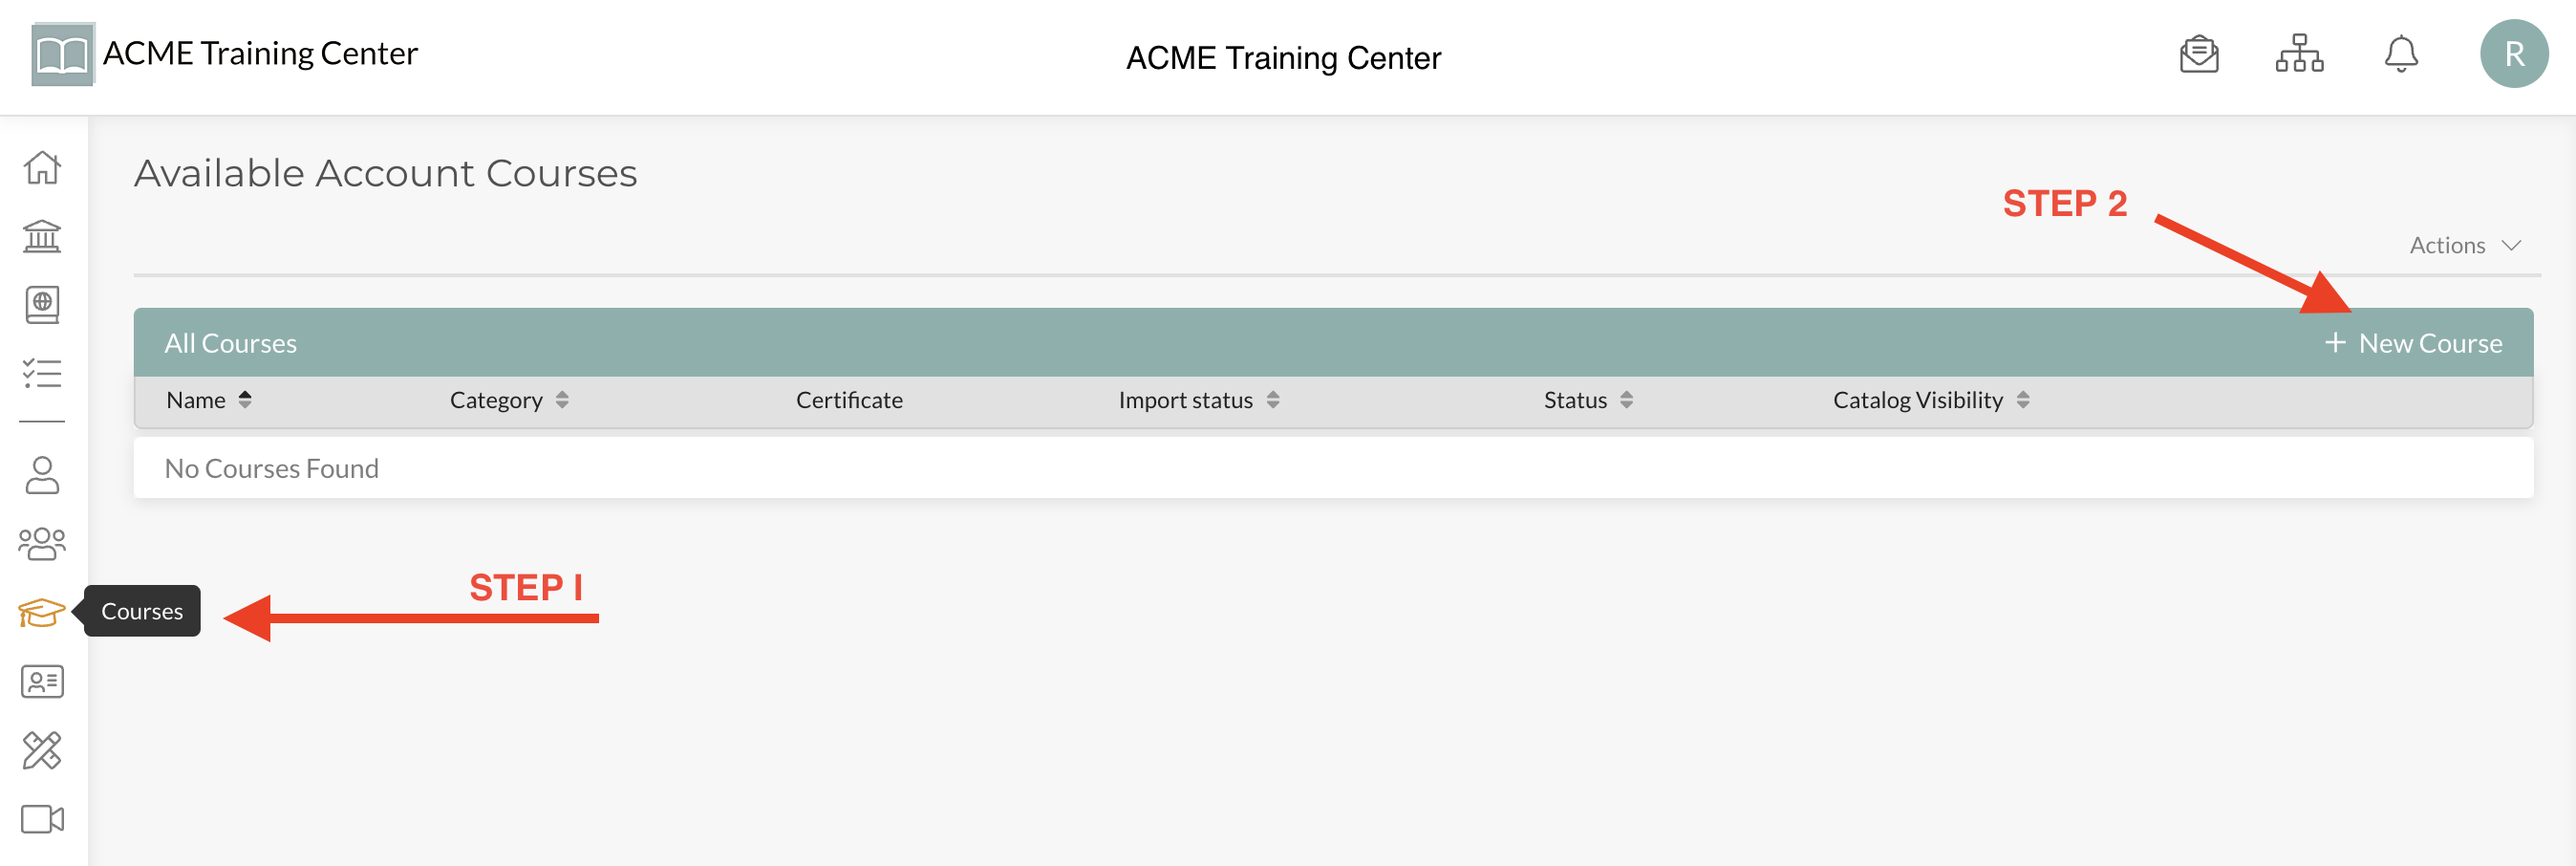
#Step 1: Where to access the Course Builder
From anywhere on your account, navigate to “Courses” (left-side menu bar) and then click “+ New Course”.
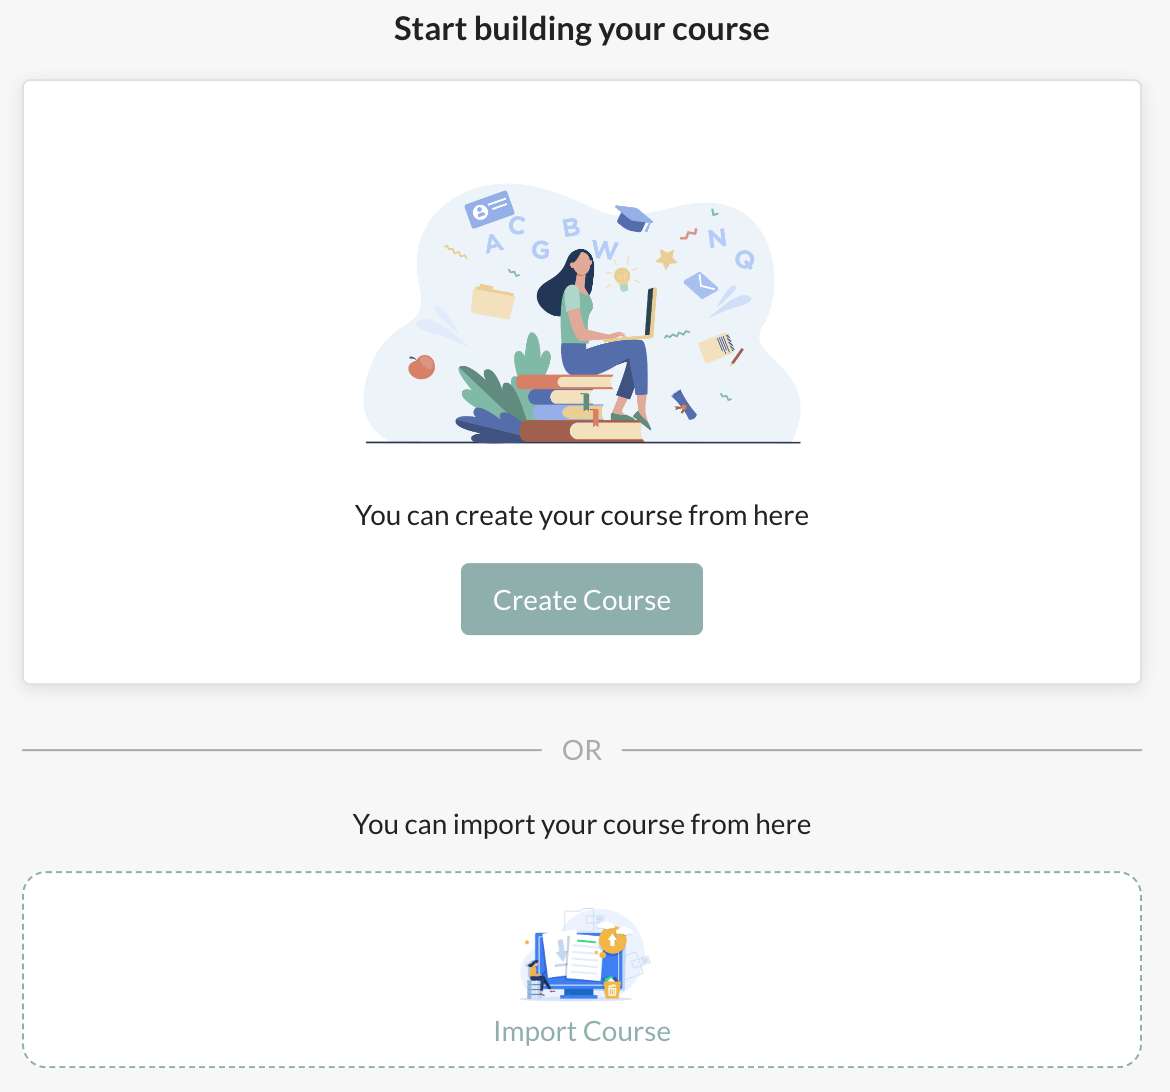
#Step 2: Choose what type of course you want to create
Select “Create Course” to start building your course natively on the Platform.
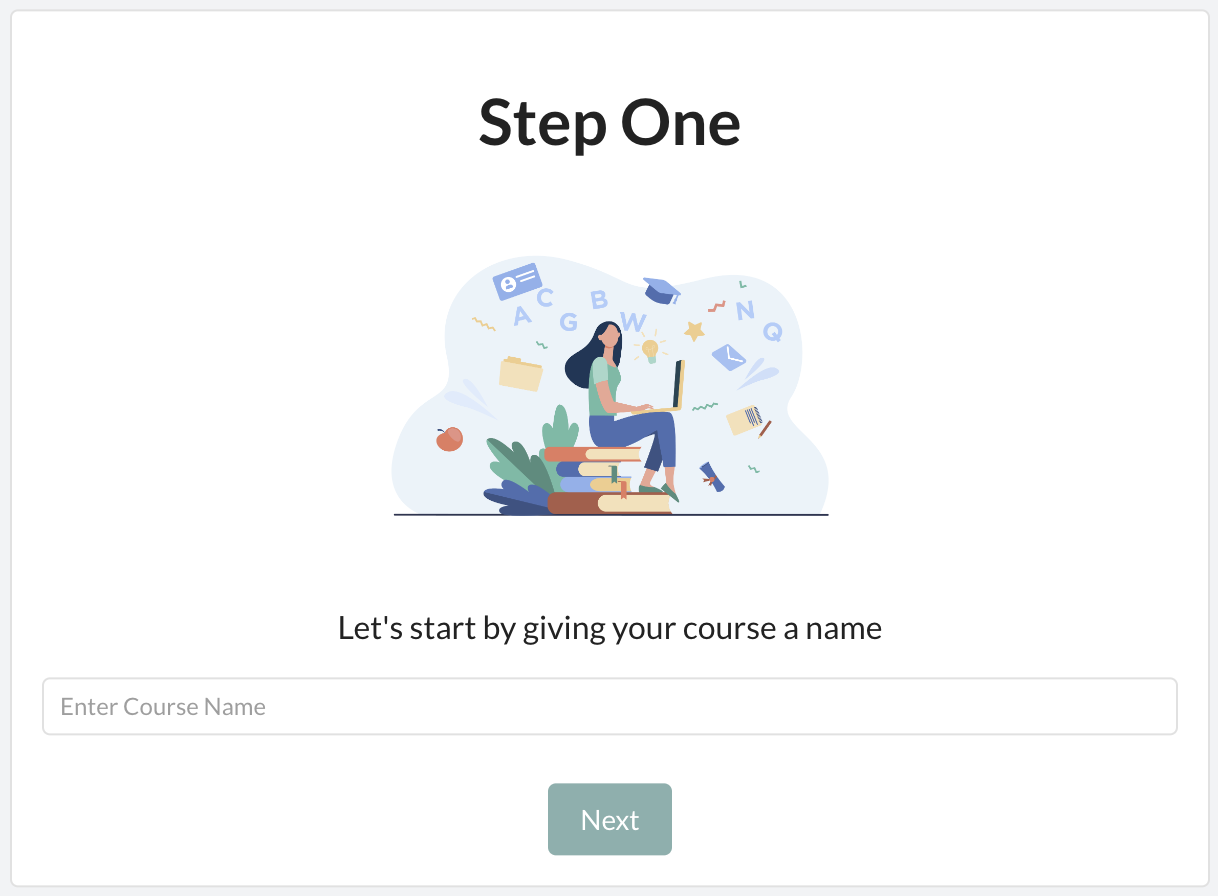
#Step 3: Name your course
Give your course a “Name” and click “Next”. You can also change your course’s name later in Course Settings.
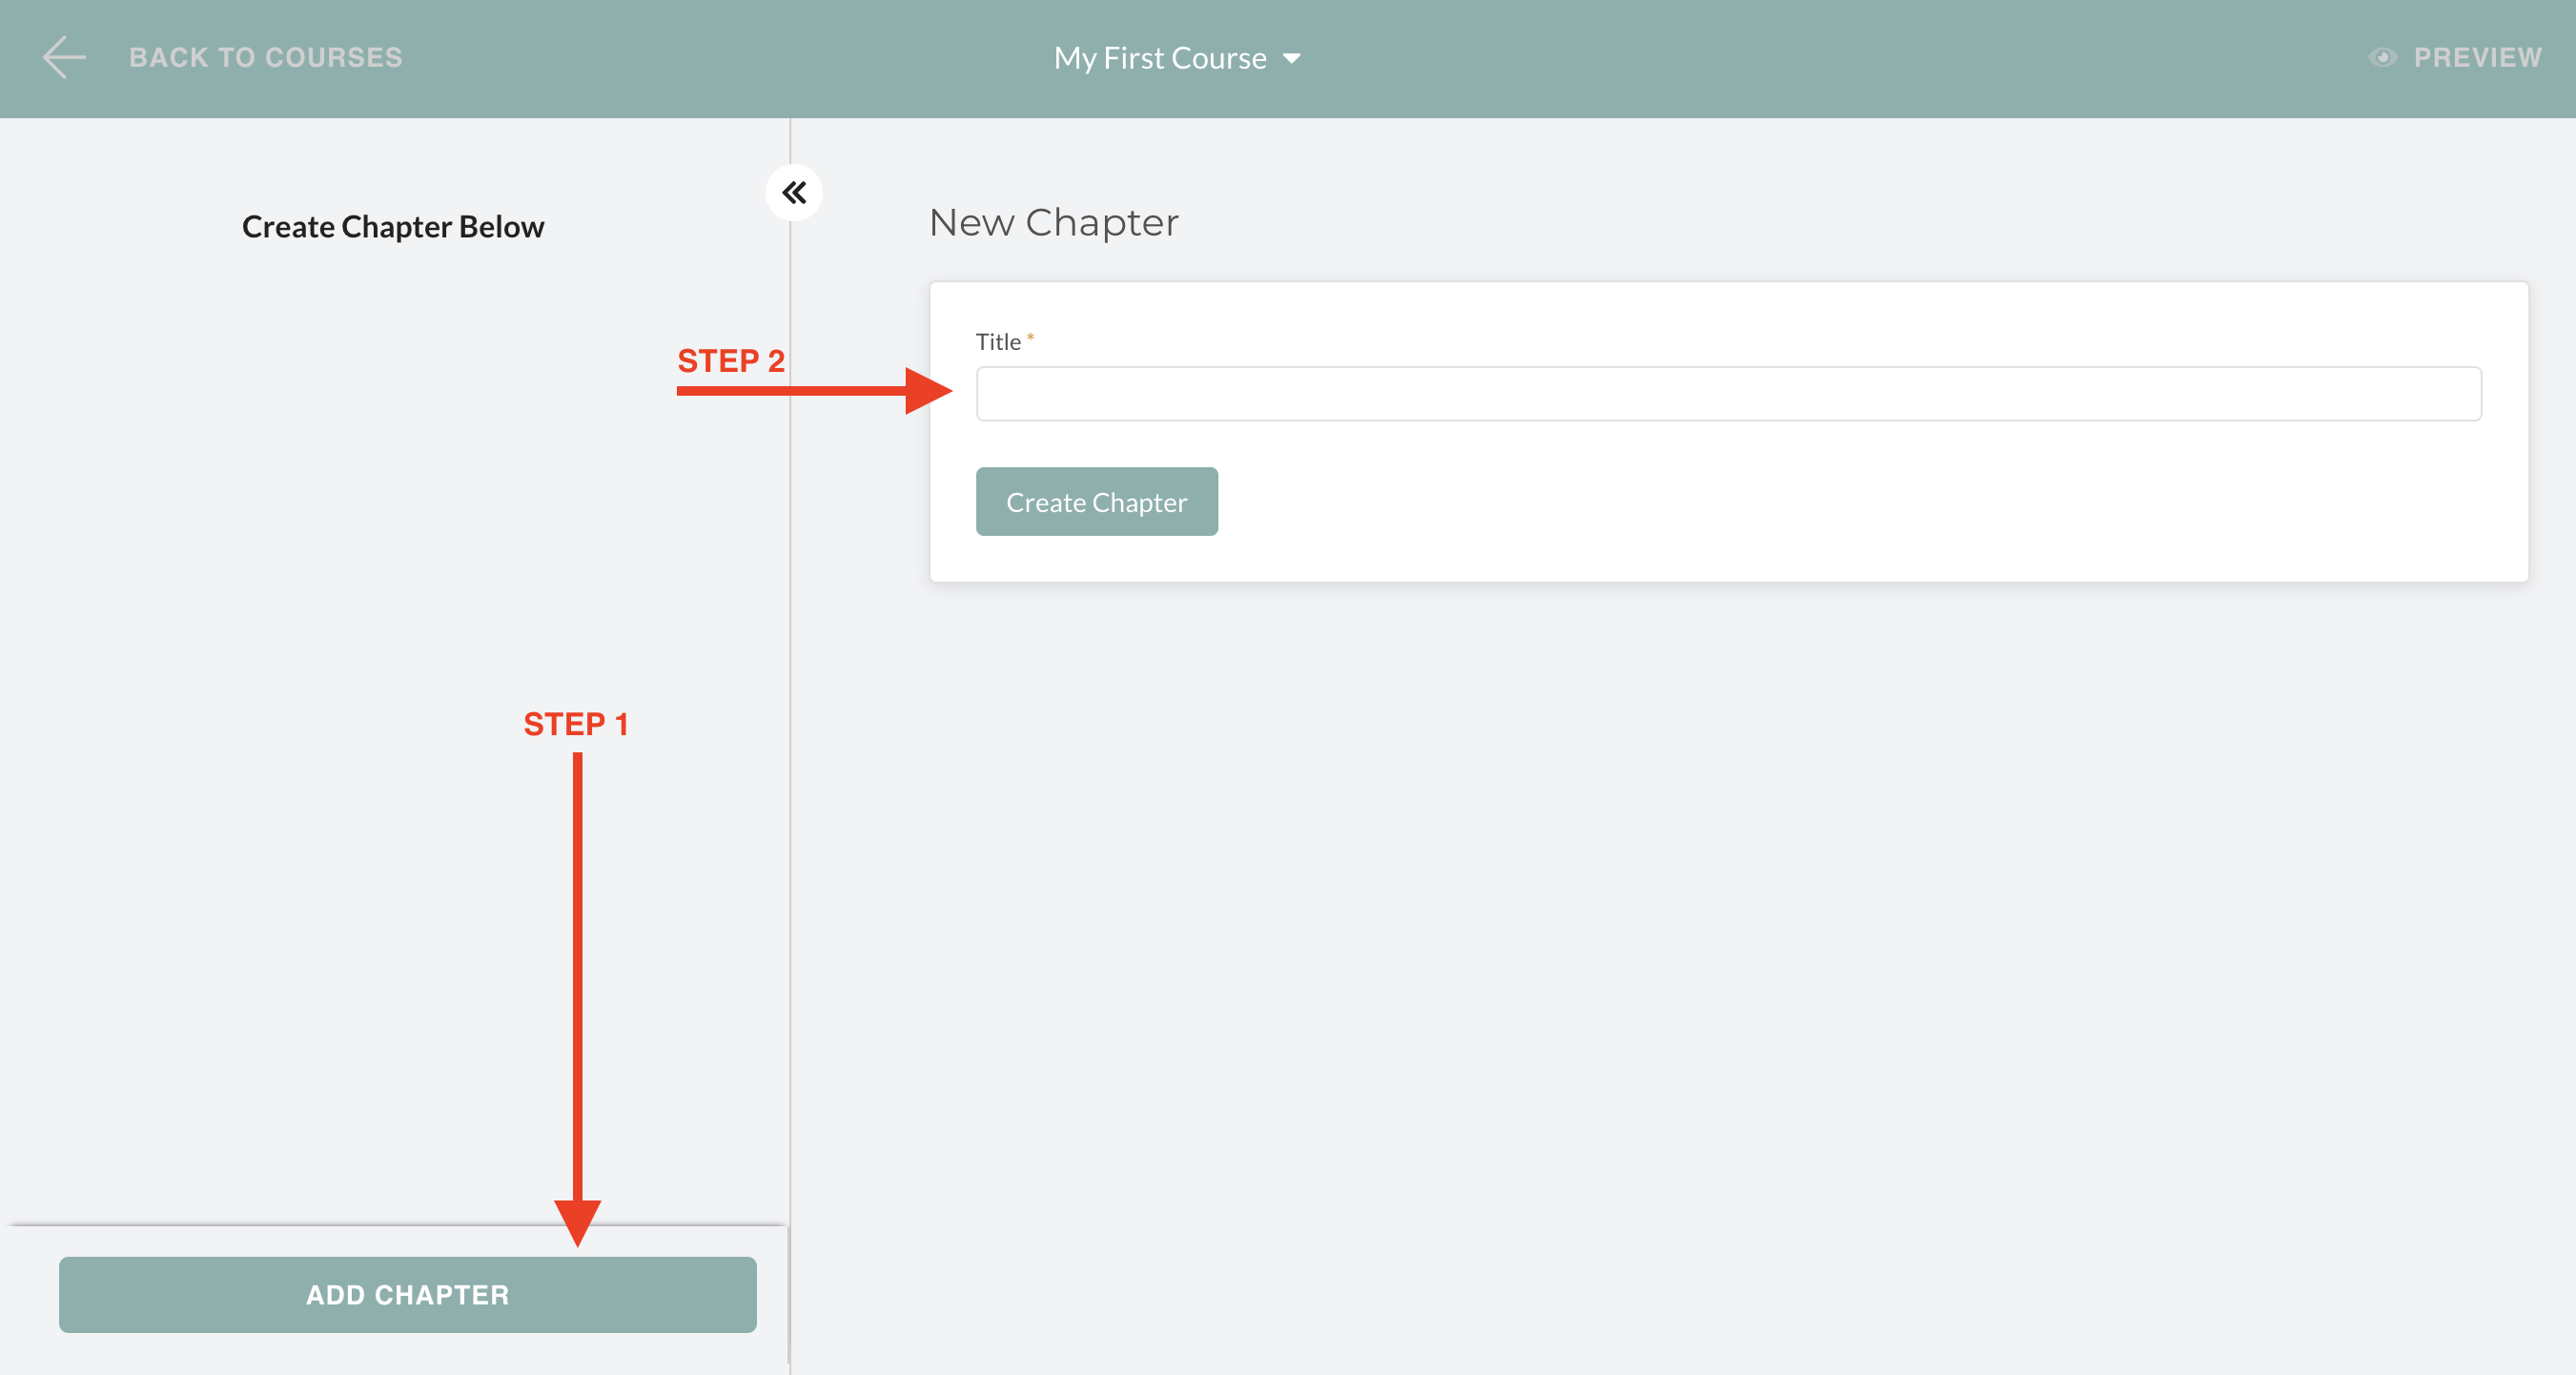
#Step 4: Add your first Course Chapter.
Click on the “ADD CHAPTER” button at the bottom left of your screen and give your chapter a name. Course must have at least 1 Chapter.
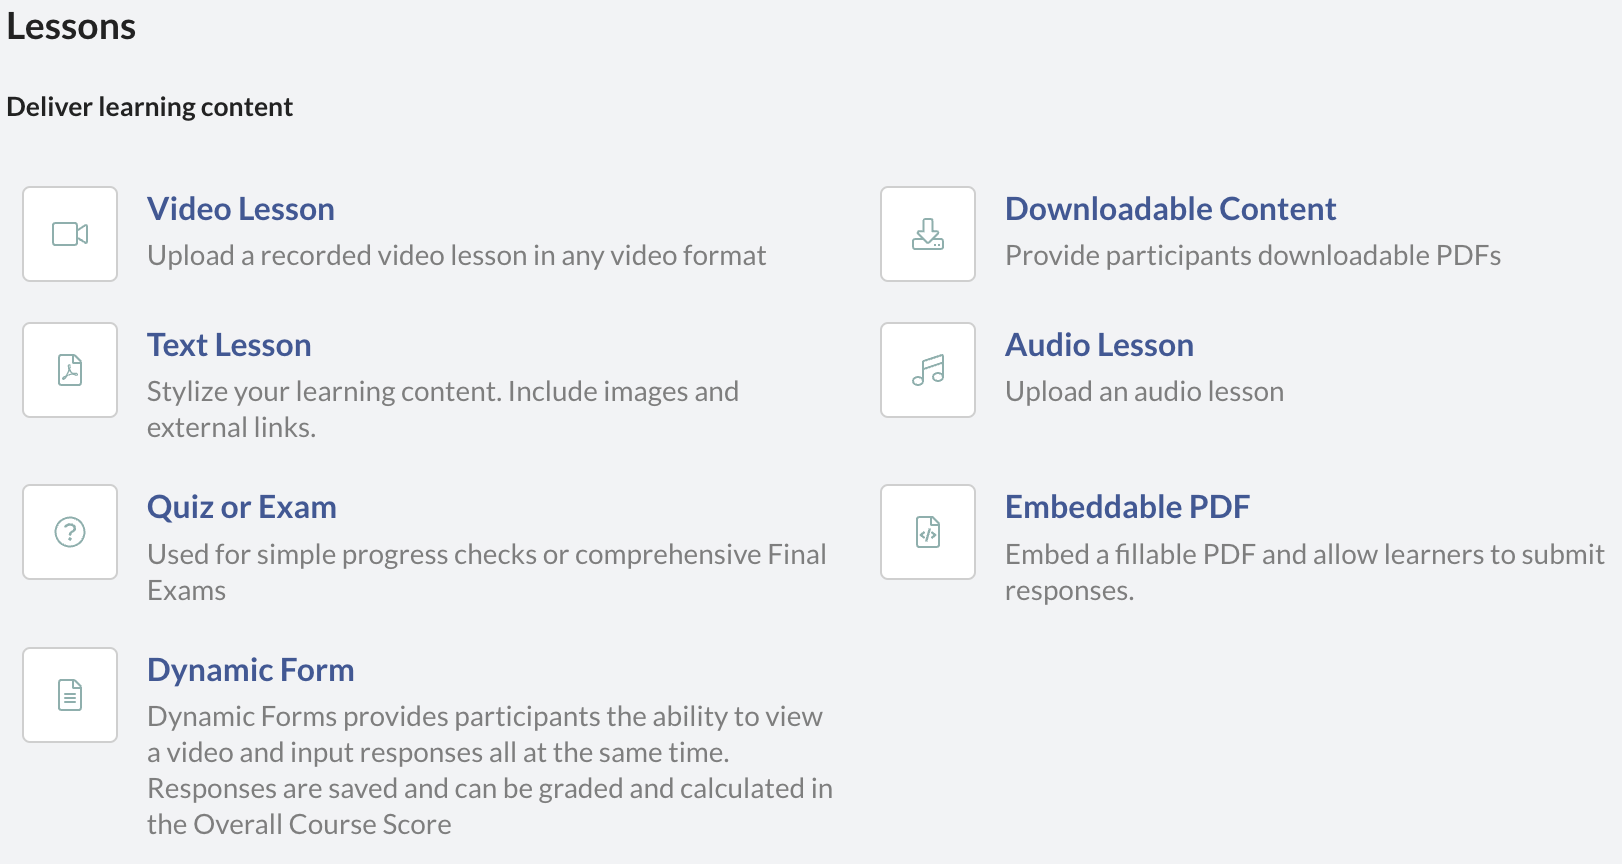
#Step 5: Add your first Lesson.
There are currently seven (7) different types of Lesson Blocks you can choose from. Select the Lesson Block you want to add content. Each Course must have at least 1 lesson.
#Step 6: Build out your course.
Continue building your course until you are done. You can leave and return to your course while you are developing it. Your course is by default in “Draft” mode until you “Publish” it.
#Step 7: Edit “Course Catalog” information.
If you plan to post this course to your “Course Catalog”, navigate to the “Settings” and select the “Catalog Settings” tab. Settings for your course is found by clicking on the ‘down carrot’ (inverted triangle) to the right of your Course Name in the Top Center of your screen. Select “Settings” from the drop-down menu.

From Settings, select the “Catalog Settings” Tab.
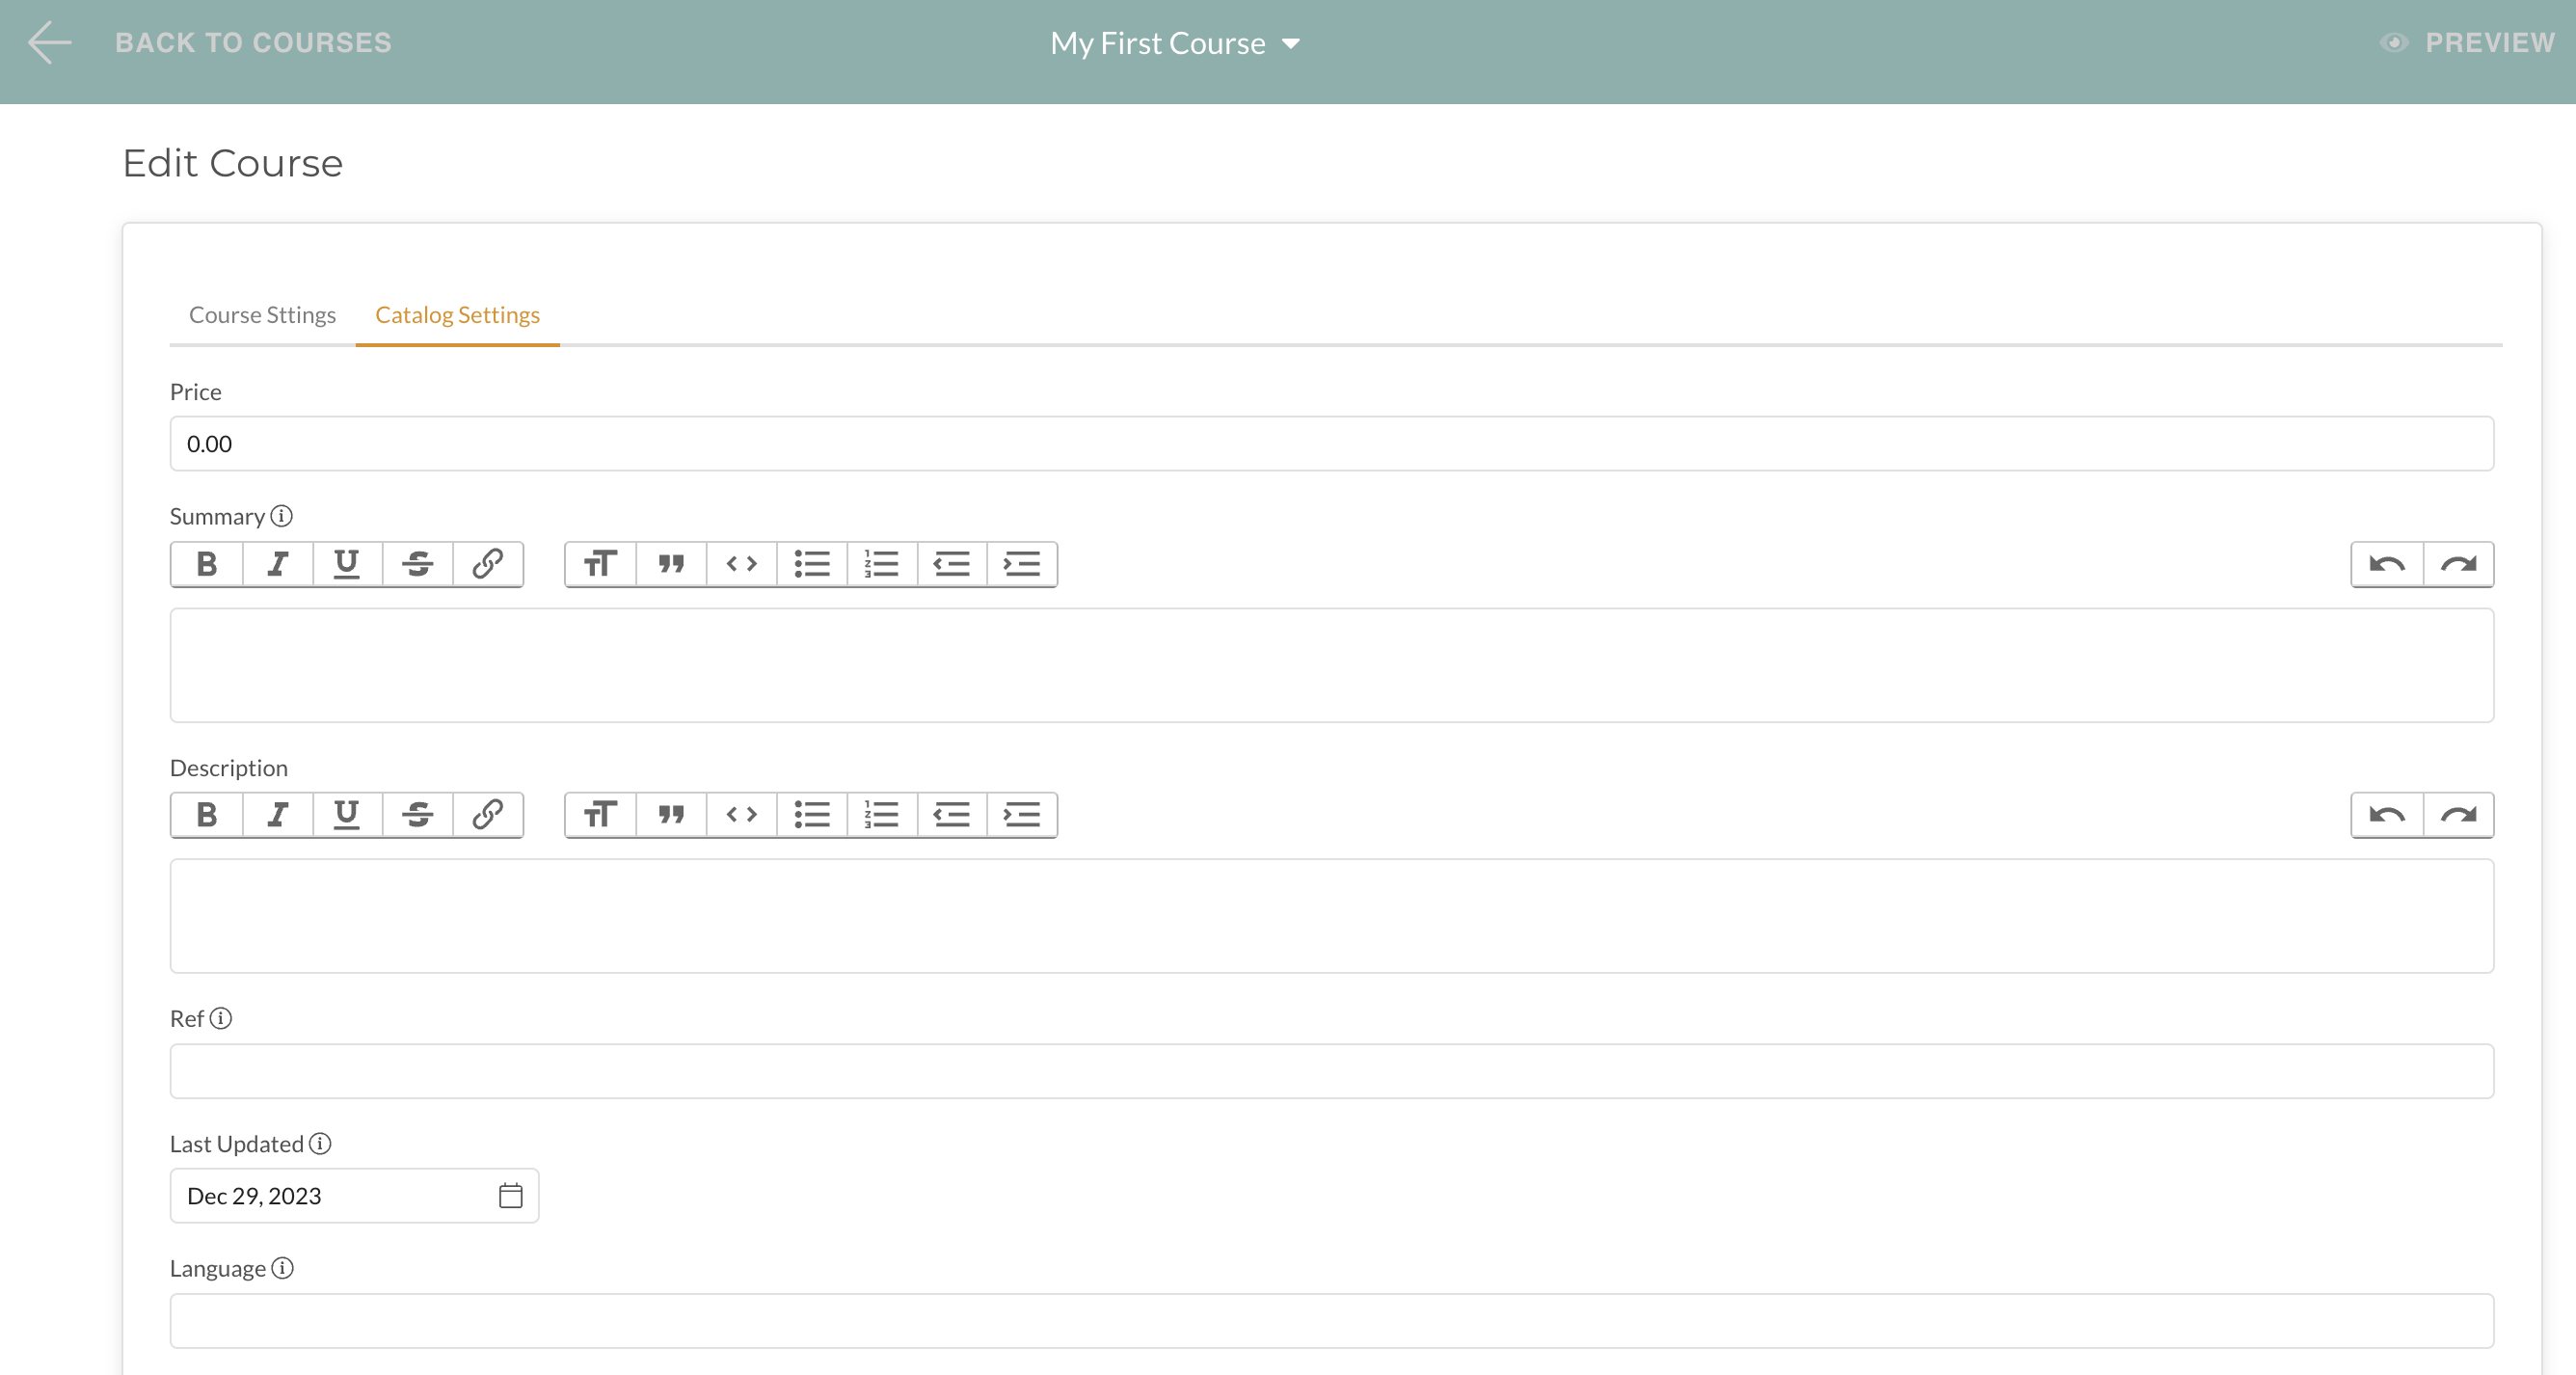
Here, in the “Catalog Settings”, you can fill out the information that will be displayed in the Catalog Listing for this course.
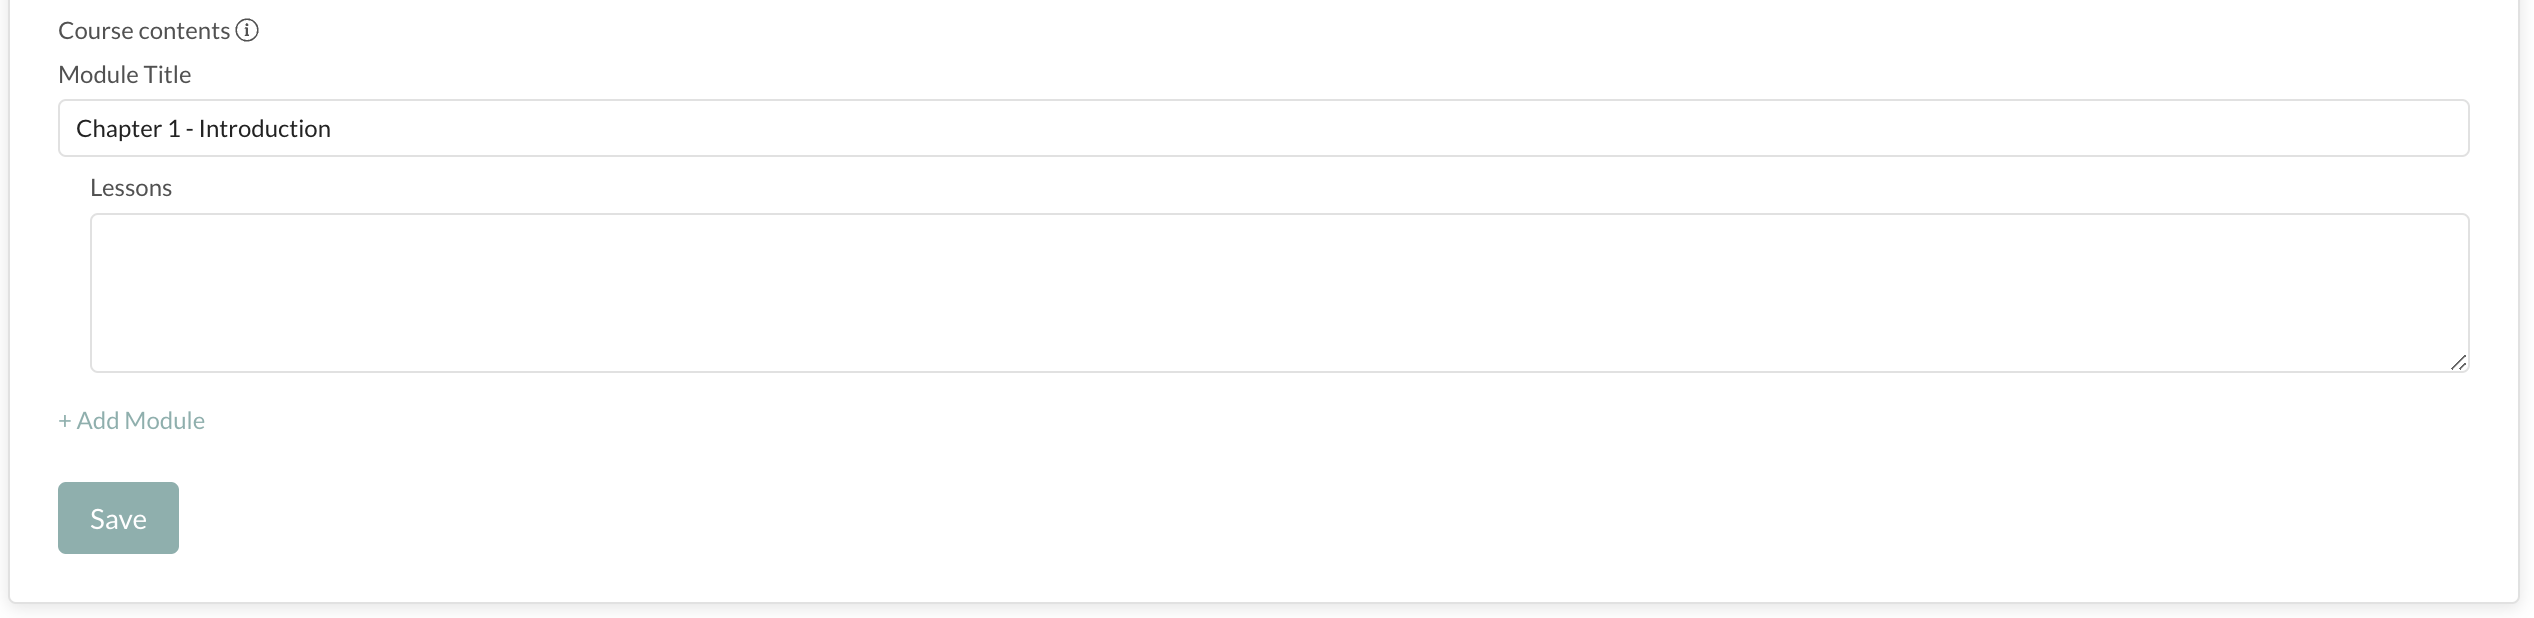
Check this out: The “Course Contents” (aka: Course Outline, etc) will self-populate from the Chapter and Lesson headings you create in your course. You can leave this area blank while you develop your course and any additions/changes to Chapter and Lesson titles will show up here. The “Course Contents” section is at the very bottom of the Catalog Settings page, just above the “Save” button.
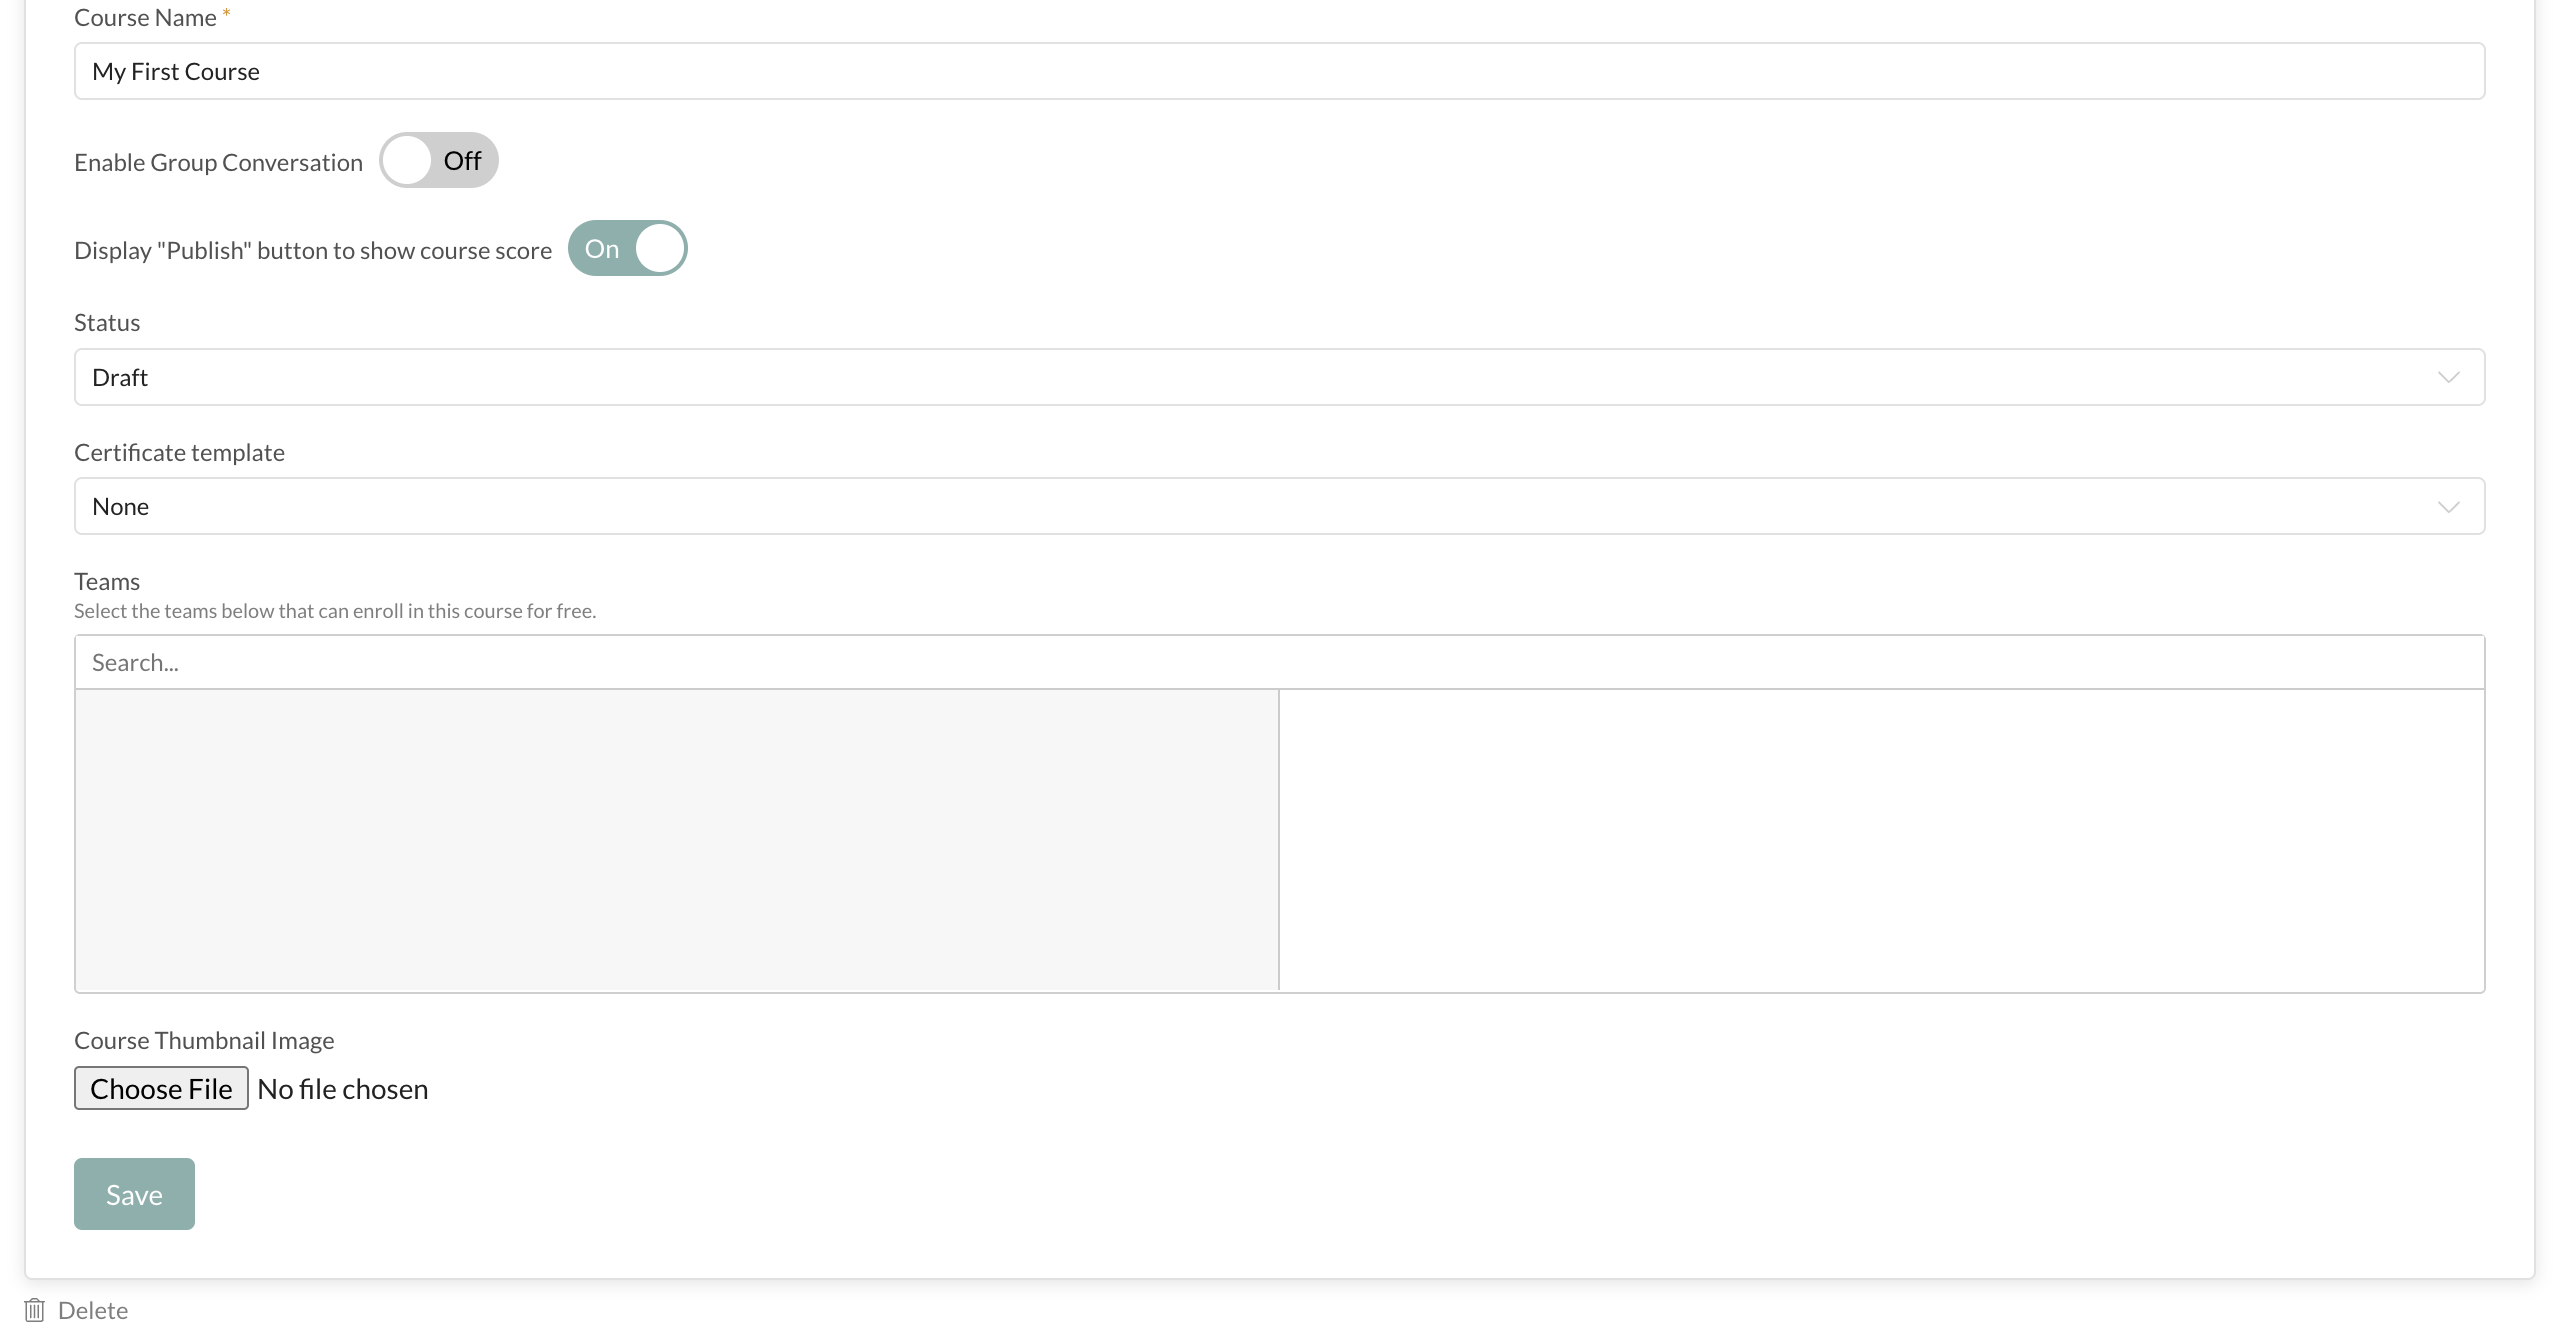
#STEP 8: Edit “Course Settings” information.
In “Course Settings”, you can:
- Edit course name
- Enable Group Conversations
- Display “Publish” button to show course score
- Change Status of course
- Include a Certificate for complete of a course
- Choose teams to make this course available to for FREE
- Set course Thumbnail Image
- Delete the Course
#Step 9: Publish Course!
Congratulations! You have completed your first course and are now ready to Publish and make it available to your learners. Change the “STATUS” of your course from “Draft” to “Publish”. When you do this, you’ll notice a second drop-down appears for “Catalog Visibility”. If you want to make this course available to your people via the catalog, then select “Visible”. When your course is “Published” and “Visible”, anyone with access to your Catalog will be able to see and enroll in the course.

You’re all set! Now that your course is published and listed in the Catalog, you’ll be notified anytime someone enrolls in the course. You can now also enroll your people in the course yourself or enroll them automatically via a Sequence if you choose.